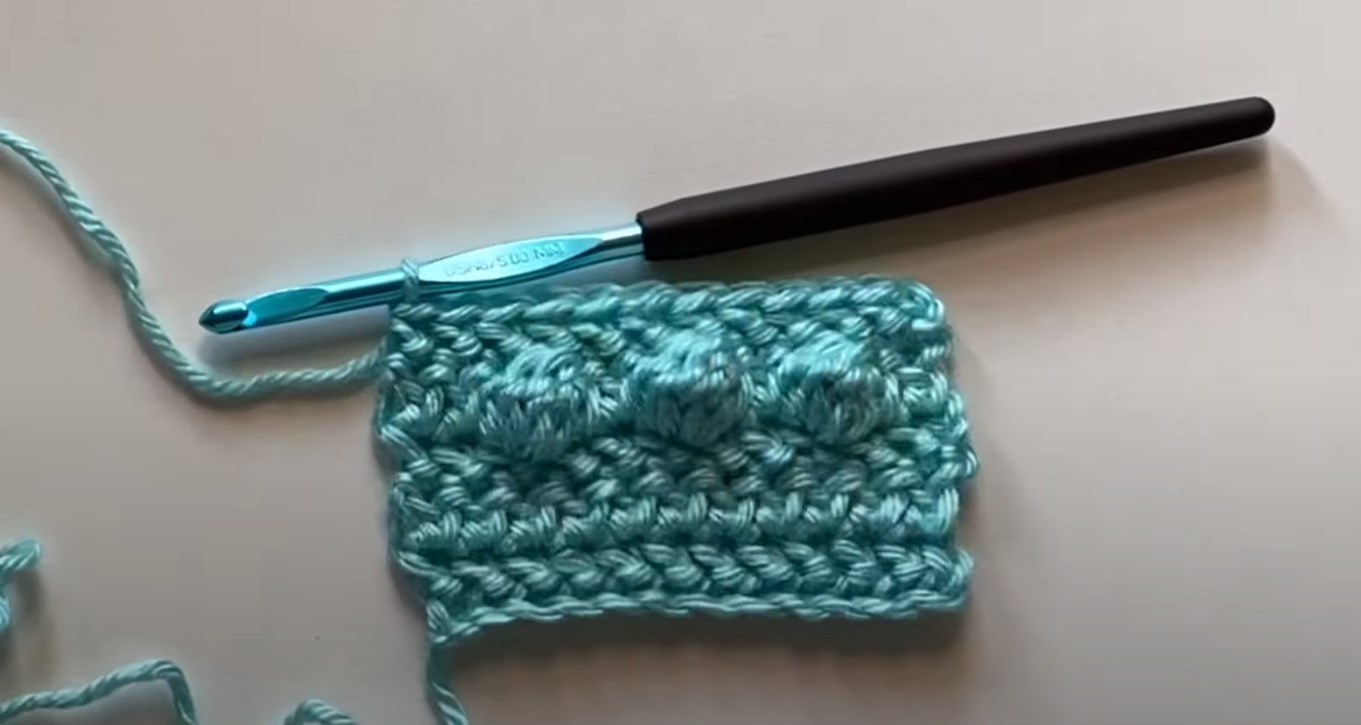
Become proficient in the art of a double crochet bobble (DC BO), a technique renowned for imparting captivating texture and depth to various crochet works. This comprehensive guide explores the intricate steps involved in executing the DC BO, providing valuable insights and practical tips to refine your crocheting abilities.
Ideal for introducing a tangible, textured touch to items like blankets, clothing, and accessories, the BSC has gained popularity among crocheting aficionados aiming to infuse their projects with an extra layer of visual and tactile appeal. This stitch not only elevates the aesthetic of the final product but also adds a unique, hands-on quality that is both pleasing to the touch and the eye.
Whether you’re a seasoned crocheter or just beginning, mastering a DC BO can significantly broaden your creative repertoire, allowing you to craft pieces with distinct character and charm.
Step-by-Step Guide to Creating a Double Crochet Bobble
Crafting a DC BO entails a sequence of yarn-over techniques combined with crochet stitches, all concentrated into a single stitch. This method results in the formation of a raised, textured ‘bobble’ that adds dimension to your fabric. In this part of the guide, each phase of the DC BO is meticulously dissected, offering an in-depth tutorial on how to adeptly execute this distinctive stitch.
To effectively create this stitch, one must be precise in the yarn-over actions and consistent in inserting the crochet hook into the same stitch. This repetition is key to developing the characteristic protrusion of the bobble on the fabric’s surface. As each yarn-over and stitch is added, the bobble begins to take shape, emerging from the flat fabric to create a noticeable and tactile element.
Steps to Craft the Double Crochet Bobble:
- Step 1: Starting: Initiate by verifying that your crochet hook holds a solitary loop. Position yourself at the specific stitch designated in your crochet design for the commencement of the bobble;
- Step 2: The Initial Yarn-Over: Circle the yarn over your crochet hook, moving from the back to the front, thus forming a yarn-over. This maneuver adds one more loop to your hook;
- Step 3: Hook Insertion: Carefully place your crochet hook into the subsequent stitch as per your pattern. After insertion, make another yarn-over and thread the yarn through the stitch, increasing your hook’s loop total to three;
- Step 4: Finishing the Half Stitch: Make an additional yarn-over and then thread the yarn through the first two loops on your hook. This action effectively completes half of a double crochet stitch, leaving you with two loops on your hook;
- Step 5: Yarn-Over Once More: Duplicate the yarn-over, bringing the yarn from back to front over your hook. This action restores the loop count on your hook to three;
- Step 6: Reinserting the Hook: Reposition the hook into the same stitch or gap you utilized earlier. Execute a yarn-over and maneuver the yarn through the stitch or space, increasing your hook’s loop count to four;
- Step 7: Crafting the Second Partial Stitch: Perform another yarn-over and draw the yarn through the top two loops on your hook, leaving three loops;
- Step 8: Additional Yarn-Over: Again, bring the yarn from the back to the front over the hook, enhancing the number of loops to four;
- Step 9: Reinserting the Hook for the Third Time: Insert the hook into the identical stitch or space as before. With another yarn-over, pull the yarn through, escalating the loop count to five;
- Step 10: Creating the Third Partial Stitch: Yarn over and weave the yarn through the initial two loops on your hook, which results in four loops remaining;
- Step 11: Yet Another Yarn-Over: Loop the yarn from back to front over the hook once more, increasing the loop count to five;
- Step 12: Fourth Reinsertion of the Hook: Re-enter the hook into the same stitch or space as previously used. Yarn over and pull through, upping the loop count on your hook to six;
- Step 13: Completing the Fourth Partial Stitch: Yarn over and pass the yarn through the first two loops on your hook, leaving five loops;
- Step 14: Finalizing: To finalize the bobble, yarn over and pull through all five loops on your hook, reducing back to a single loop and marking the completion of your DC BO.
Exploring Bobble Stitch Variations
The size of bobbles in your crochet project can significantly impact the overall texture and appearance. Here’s how to adjust the size:
- Smaller Bubbles: Decrease the number of yarn overs and stitches in each bobble to create a more subtle, dainty effect;
- Larger Bubbles: Increase yarn overs and stitches for each bobble to make a bold, pronounced textural element.
Combining Different Yarns
Experimenting with various yarn types in a single project can lead to exciting textural contrasts. Here are some ideas:
- Texture Variation: Mix smooth yarns with textured ones like bouclé or tweed to create tactile diversity;
- Thickness Contrast: Combine thin yarns with thicker ones within your project for a varied tactile feel.
Creative Color Integration
Incorporating contrasting colors in your bobbles can bring a dynamic visual flair to your crochet pieces:
- Color Blocking: Use starkly contrasting colors for the bobbles against a neutral background to create eye-catching patterns;
- Gradient Effect: Gradually change colors to create an ombre effect, adding a sophisticated touch to your project.
Project Ideas and Applications
The bobble stitch lends itself to a variety of projects. This section provides creative ideas for incorporating this stitch into your crochet work.
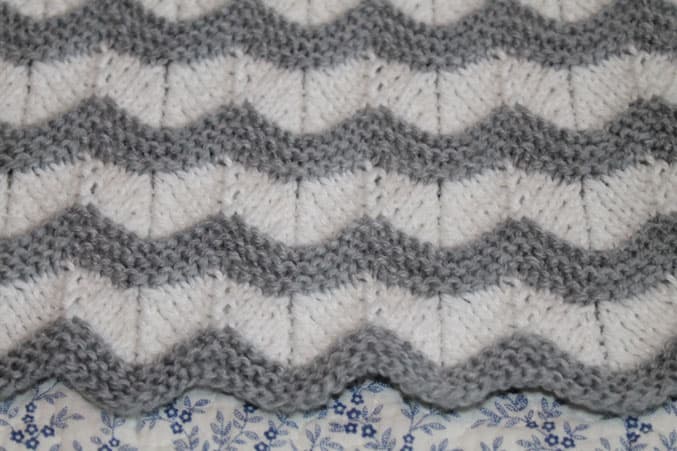
Textured Blankets and Throws
The stitch creates an unparalleled tactile experience, making it an excellent choice for blankets and throws. These projects stand out for several reasons:
- Visual Appeal: The raised texture of the bobbles adds a visually appealing three-dimensional aspect;
- Comfort and Warmth: Blankets and throws with bobbles offer a cozy, snuggly feel, perfect for colder seasons;
- Customization: Varying the size and color of the bobbles can create unique patterns and designs, allowing for complete customization to match any decor style;
- Gift Ideas: A bobble-stitched blanket or throw makes for a thoughtful and personalized gift, especially for housewarmings or weddings.
Fashion Accessories
Incorporating bobbles into fashion accessories like hats, scarves, or bags can elevate their style quotient significantly:
- Hats and Beanies: Adding a row of bobbles to the brim or body can give an ordinary hat or beanie a chic and trendy look;
- Scarves: Bobbles along the edges or in specific patterns can transform a simple scarf into a statement accessory;
- Bags: Bobbles can be used to create textured patterns on handbags, totes, and clutches, adding an element of playfulness and uniqueness;
- Customization and Gifting: Personalized bobble-stitched accessories are excellent for gifting and can be customized to suit the recipient’s taste and style.
Home Decor
The versatility of the bobble stitch lends itself wonderfully to home decor, particularly in items like cushion covers and wall hangings.
- Cushion Covers: Bobbles can be strategically placed to create patterns or random designs, adding a pop of texture to living rooms or bedrooms;
- Wall Hangings: Incorporating bobbles into crochet wall hangings can create a piece of art that adds depth and interest to any room;
- Mixing Textures: Combining the stitch with other crochet techniques can produce intricate designs, perfect for modern and eclectic interiors;
- Personalized Decor: Creating home decor items with bobbles allows for the personalization of space, making a house feel more like a home.
In each of these projects, the stitch offers a unique texture and a creative way to add a personal touch to everyday items. Whether it’s for personal use, as a gift, or to add to a home’s aesthetic, the stitch can elevate the ordinary into something truly special.
For more advanced crochet techniques, consider exploring our detailed article on the knitting gauge chart to ensure your projects are accurately sized. Additionally, our guide on Paintbox Yarns offers insights into selecting the perfect yarn for your next crochet endeavor.
Embracing Raised Stitch Techniques
The world of crochet offers an array of techniques to create raised, textured patterns that add a new dimension to your handcrafted items. One such method involves crafting protruding stitches, akin to the popular ‘bobble’, which provide a distinct feel and appearance to various crochet projects.
Advantages of Raised Stitch Techniques:
- Enhanced Visual Interest: These stitches create a 3D effect on the fabric, offering a visually stimulating experience;
- Tactile Sensation: The raised nature of these stitches adds a unique tactile element, making them ideal for items like sensory blankets or toys;
- Versatility in Design: Incorporating these stitches can transform an ordinary project into an extraordinary one, with endless possibilities for creative expression.
Applications in Crochet Projects:
- Home Décor: Cushions, throws, and rugs with these textured stitches can add comfort and style to any living space;
- Fashionable Garments: Sweaters, scarves, and hats featuring these stitches stand out with a bespoke, designer quality;
- Children’s Items: Toys and blankets incorporating these tactile stitches can provide sensory stimulation beneficial for a child’s development.
Tips for Perfecting Raised Stitch Techniques:
- Consistent Tension: Maintaining an even tension is crucial for achieving uniformity in the size and shape of the stitches;
- Yarn Choice: Opting for yarns with good stitch definition, such as cotton or acrylic, can help highlight the textured patterns;
- Practice and Experimentation: Regular practice and experimenting with different hook sizes and yarn types can enhance your skill and creativity with these stitches.
Incorporating these raised stitch techniques into your crochet repertoire opens up a world of creative possibilities, allowing you to craft items that are not only visually appealing but also rich in texture and feel. Whether you’re creating a cozy blanket or a stylish accessory, these stitches can add that special touch that makes your crochet projects truly unique.
Conclusion
The bobble stitch crochet offers a world of creative possibilities for adding texture and dimension to various crochet projects. With practice, this technique can be mastered and adapted to suit a wide range of designs, from cozy blankets to stylish accessories.
As you continue to explore the vast world of crochet, remember to experiment with different yarns, colors, and stitch sizes to create unique and personalized pieces.